Showing posts with label tutorial. Show all posts

Tuesday, December 3, 2013

Aqua Sweater Refashion


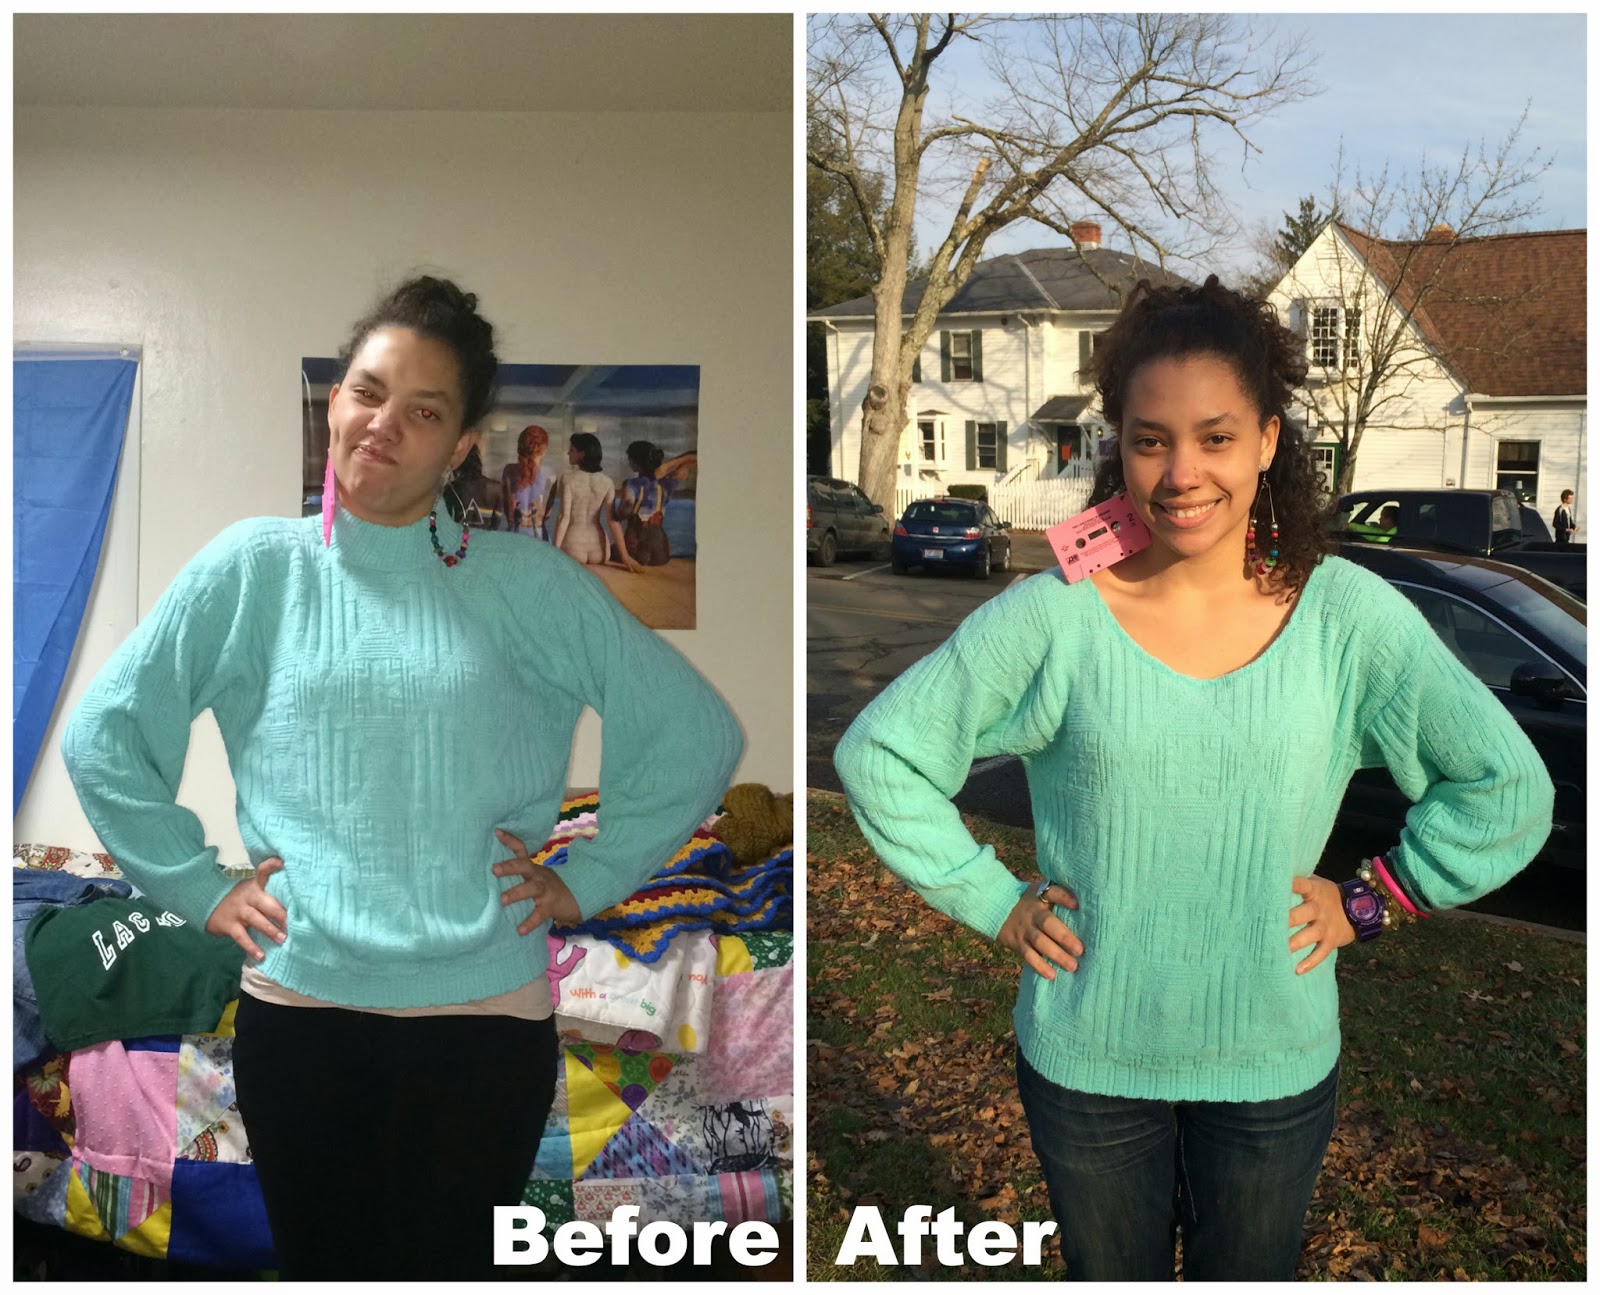
I wasn't feeling the tight neck, so I decided to loosen it up a bit. I got this sweater at the Goodwill Outlet in St. Louis where everything (literally, everything) is 79 cents per pound, except glass and books, which are 39 cents per pound. I estimate the cost of this sweater at about 12 cents. 

I cut off the neck conservatively to account for the stretching.  

I turned it inside out and folded over the edge twice so that the raw edges were not visible. 

I took it over to my machine and sewed it down with matching thread, but I left the presser foot on the machine raised so it didn't stretch out the neck even more. 


Later I frolicked. 

Then I frolicked more. 

Then I wrestled my phone away from Gabby. 

My awesome photographer Gabby! 

Thursday, July 5, 2012

Ombre Tank DIY


I made this tank for my beau for his 22nd birthday and it turned out great. It was really easy ande cheap to make. I bought the shirt on Amazon for $7 with free shipping and the RIT dye cost about $3, depending on the dye you choose it may say to add salt if you are dyeing cotton but read your directions carefully and do what you think is best for the look you are going for. All you have to do is make a dye bath of the shade you want in the middle of the shirt and dip almost all of the shirt in quickly and leave the top 1/4 out and let the rest sit until you have a shade you like and slowly pull the shirt out to get darker shades. Once you get to the parts you want to be the darkest, you should mix more dye in a small cup with water and take the shirt out completely and mix in the dye from the cup to achieve the darkest shades. Once it is as dark as you like you should rinse it out until the water runs clear and hang to dry. These pics are after the first wash, but it didn't fade a lot even after the wash.

Friday, July 22, 2011

Earring Madness!!

I am trying my hand at making earrings with my trusty supply of buttons and my glue gun in my artillery. I also tried to make some very small fabric flowers, didn't work out too well, I will have to keep practicing.


Sunday, July 17, 2011

Knotted Tie Necklace

I inherited a lot of ties from my grandfather a few years ago and I made a large purse out of most of them but there are still some stragglers that could use a good upcycle. I stumbledupon this awesome link to make a necklace out of ties. The lady on this original uses discounted beads from Micheal's to make her necklaces, but after stocking overpriced beads at Hancock Fabrics for the last week I knew I didn't want to spend that much on beads so my other ideas were to use rolled paper beads and the glass rocks that people use in vases as bead substitutes. Here is what I came up with.  

This whole sack of rocks cost $1 at Dollar Tree, you can find them almost anywhere, but places like Target and Walmart will rip you off and charge like $3 or $5 for them. If you are like me and refuse to be conned, don't pay more than $1

Back View


front

Thursday, July 14, 2011

Yarn Dyeing with Kool-Aid and Food Coloring

So....I found this link on how to dye yarn with Kool- Aid with long colorways and I decided to try it.

Materials:
1 skein of yarn that is cotton or wool
Kool Aid
Cups or jars (one for each color)


I wrapped the yarn into loose balls to absorb the color. 


I sopped up some warm water with them in a casserole dish.


I mixed the Kool-Aid with enough HOT HOT HOT water to dissolve it and help the yarn absorb the color. The blue and green are food coloring, the green worked very well, but the blue hardly worked at all, so I mixed up a lot of the other Kool-Aid colors and made a burgandyish color. 


In the tutorial it suggests heating the jars in the microwave or in a double boiler, but my water stayed hot for a while so I didn't. 


Wrapped yarn and hung on my shower rod to dry. 
Related Posts Plugin for WordPress, Blogger...